Jefferson Swivel and Secretary

Showing posts with label Painting. Show all posts

Sunday, February 26, 2012

Painting/Aging a Windsor Chair

For several years, I did a very (extremely) labor intensive paint finish using latex paint and lacquer to get a chipped paint effect and age, I have to say it looked good but the time spent was way to much and sometimes took longer to paint than to make the project. Once I began using Real Milk Paint, it cut way down on the labor portion of my finishing. While it's not what most would consider an easy to apply method I use, it's still much easier than the lacquer method and I can have a 3 color paint finish done in 3 days per chair. Here's how I go about it...
   
.
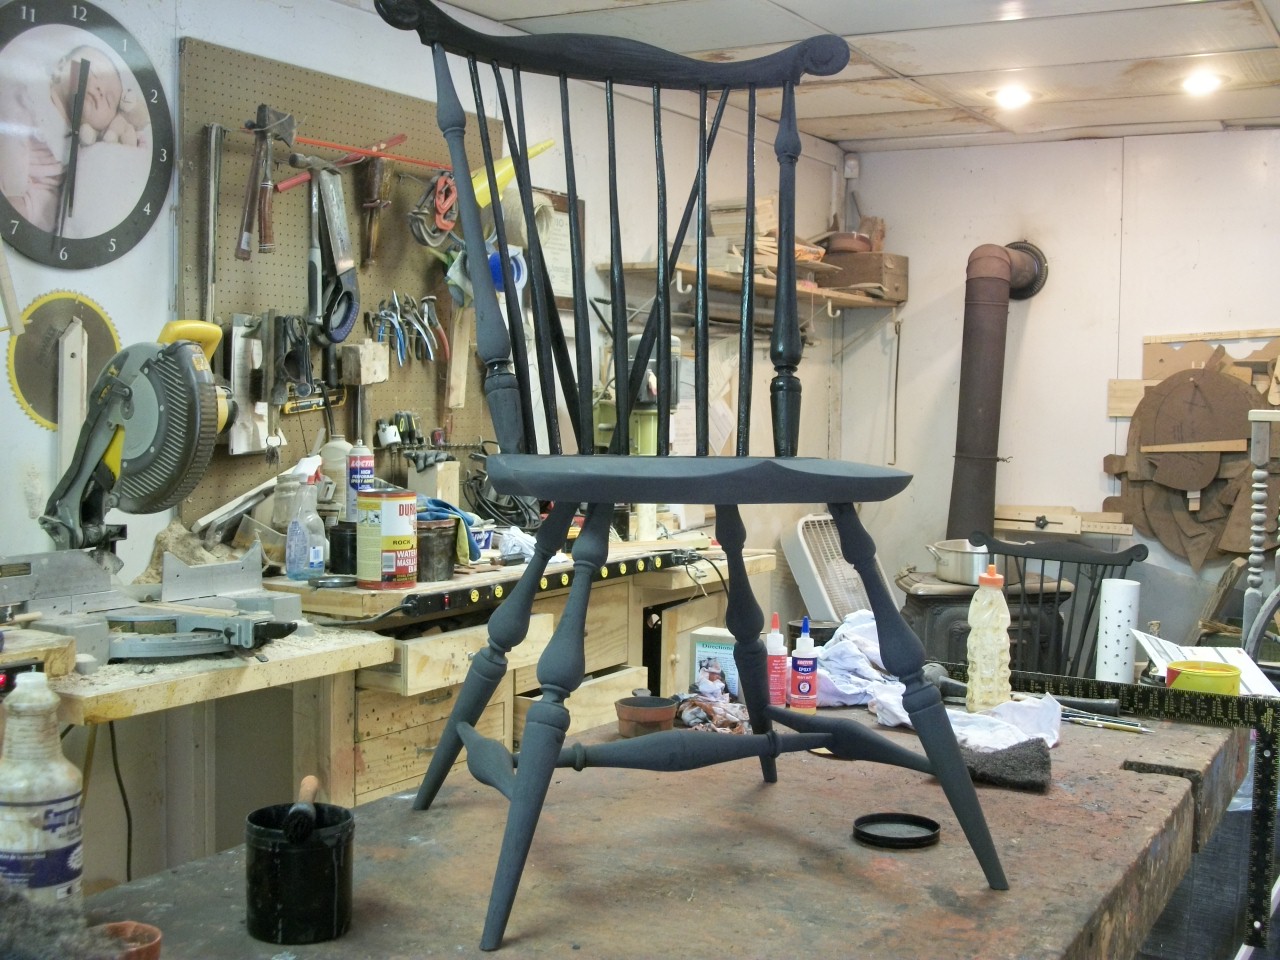
         First I use a base coat, in this case Mustard. This first coat basically serves as a primer and gives the foundation of this process.

         Once the first coat completely dries in 1-2 hours, I use a scotch brite pad to burnish the entire chair. All the turnings, spindles, seat, and bows, get burnished. It takes elbow grease but you get this shiny appearance letting you know you've done it right.

         Here you can see the difference between the unburnished chair (left) and the burnished one (right). That shine helps the next coats go on much smoother and silkier and results in a completely smooth and inviting finish.

The legs show the same, left side unburnished, and right side burnished.  
After this burnished coat, I'll apply a second color in this case Terra Cotta Red
following the same steps. If you strain your paint you can skip the burnishing step and apply the black over the red, otherwise you'll have to burnish the red as well.
 I thin down the top color (black) to make it easier to burnish and get the wear I'm looking for. After the paint dries, use a subtle approach to add age and wear.

 I'll use a dull card scarper to simulate the chips a dings, worn out 400 grit wet/dry paper to do the blending, and if it's not blending fast enough, I use worn out 180 grit to get where I want to go.

 I try to focus on wear normal areas the get natural and the most common looking wear. The front legs, the seat edge and saddled area, the hand holds a little on the bows and spindles etc. You can go to far quick, it's better to do a little and step back to see how it looks. You can use Denatured Alcohol to simulate what it'll look like with a finish on. It will show more than you think once the finish is applied. So be cautious.
 Work thoughtfully, make up a story as you do this and imagine what this chair was mostly used for. I sometimes want a heavy wear and think a chair might have been used at a tavern and got used heavily, such as Bar brawls, spilled tankards of ale and the like. Other chairs were in a home at a table and over a 225 year period got used, but nothing like that in a tavern, these kind of made up stories sound corny, but they work and make you think about the finish more than just going randomly. Once you make these stories up tone it back a little because if you make it too worn, in 30 or 40 years it'll just look like it needs to be refinished. You want to give an aged appearance now but let the chair develop it's own character in time.

After I'm happy with the amount of aging, it's ready for the finish, I use an oil/varnish mix 1:1:1 ratio of Boiled Linseed Oil, Spar Varnish, and turpentine. The oil penetrates into the wood, the spar varnish builds up and produces a faster shine and the turpentine is simply a thinner that speeds the dry time. After usually 2 or 3 coats, the chair is ready for use. I usually like it to set for a few days before any use. The picture above shows a chair with one coat of oil next to an un-oiled one. After another  coat or two, the chair starts taking on a nice dull satiny sheen. The more coats you put on the more shine you'll get. If you don't like the artificial age on your pieces, this process is still a good way to go, just don't do the scraping and sanding and you'll get a great paint job and finish that will last longer than you may want.
Thie pics below are with only 2 coats of finish on. The shine is a little dull but I made these for a client and want to make sure it doesn't go to shiny till they give their approval. Getting that balance between what you think is the age and shine someone wants and what they think is right, is one of the hardest parts in furniture making. I look at it as I can always fix it either way and make it to their taste, which is the important thing.


Monday, January 30, 2012

Nantucket Sailor Boy Whirligig


After some digging around online and looking for a quick little project to do today while my chair parts dry in the kiln, I decided to make something I have never made before, a Whirligig. You've most likely seen the ducks or the goose, maybe the guy sawing a log or the woman washing clothes, but for those of you who haven't seen them, the Nantucket Sailor Boy Whirligig is one that is very, very collectible and very, very expensive in antique form. I have looked at some online that are in the $3800 range. While this isn't the norm and I don't know who would buy one for that, it's kind of cool little guy to make.

     Here is the version I made today just to pass the time. Its just a 3/4" thick piece of wood cut to shape, I turned the hat and the arms on the lathe, made the paddles out of 3/16" thick walnut and shaped it with a block plane then took a knife and whittled the profile. After some headscratching to get the paint colors right, I mixed up about 5 different colors and started to paint. I wanted mine to have that old and crusty dry paint texture of an antique, so with a little sanding and buffing this is what came out. You can just make out the word Nantucket on the sailors shirt but that, in my opinion, was the hardest part. I'm not a real steady hand when it comes to details like that and had to repaint it once, hence the darker blue under the word. All and all it was fun just to make something new and different. I could see getting into making these just to please the 8 year old in me. Theres something about a wooden toy with moving parts that makes the young'un in me smile.


Sunday, January 22, 2012

Mini Log Cabins of the Frontier


I've always loved the look of those old, square log cabins you see that were built in the pioneer days, and actually earlier than that.  Some are still standing, some falling down and more importantly some being brought back to life and lived in again. 
    So with an idea for a mini sized version, I've started making these miniature sized Log Cabins. From what I've been told, German fathers would actually make these to give to a son as sort of a good luck charm and to bring peace and prosperity to him and his new bride. I don't know if that's true, but its kind of a cool story.


I started making these based just off of pictures I've seen of old ones still standing. The logs I "hand hewn" with a drawknife and each shingle is applied one at a time. I put in some chinking compound a little paint/stain and wallah, I have a fairly authentic looking mini log cabin. I've kinda got the bug from making these. It's almost a sky's the limit as what you an do, and you can go as primitive as you want. I would love to someday, either find an old one still standing and move it to my land or build one from scratch, but until then this is going to have to satisfy. Hey, maybe it could serve as a blue print for one I someday plan to build, and that alone is worth the time involved to make these. 

Sunday, January 1, 2012

Flat Screen TV Cabinet


 After over a month of working on this "beast", I finally wrapped it up today. The finish alone took a week to apply and get to what I think, is a pretty realistic looking primitive finish. I made this piece for a client to house a large 55" flat screen and the components that go with it.  It's made in two pieces, the wood is poplar and and has bi-folding upper doors.


With the doors open you can see how much room is saved by the bi-fold doors. The doors are over 25" wide and would take up a lot of room when swung open if made into a full door. The color on the interior is a mixture of Butternut Squash, Black, Cream, with a touch of Mustard. Once the mixture is applied it looks horrible, not something you want happening on such a large piece. When the paint dried it gave a dirty brownish, black color that "resembles" old wood left to age. The results I am fairly happy with although I will continue trying different variations till I get the inside to look like the grungy brown, black color you see on most primitive interior cabinets.


This shows a close up of the door joinery. I used through mortise and tenons and put riven pins on a diagonal. This piece has fairly heavy doors and I wanted there to be no issue with sag. This method should help keep it as square as possible.


The color chosen, was a 3 color milk paint finish, or as I call it, my "Time Worn Finish". Black was the first coat, then a mixture of Butternut Squash, Yellow Ochre and Black to get the "pumkin'y brown" color you see, followed by a turquoise and white mixture. I put on one coat of oil/varnish to give some protection but not do away with the "dry paint" look and feel. I did the aging with scrapers, sandpaper, and a ton of elbow grease. It's not everyones preference, but for the primitive antique'r, it gives you a way to have a large flat screen TV in a cabinet that fits the TV, and still get a worn primitive look, kind of a 17th century meets the 21st century, cabinet.  It can be made out of any wood for a more formal look if needed.
The finshed cabinet in it's home.  

Wednesday, December 28, 2011

Rusting screws for a primitive antique look

I have always liked the look of painted antiques and how the paint seems worn (battered in some cases) and all the patina that naturally comes with age. Some of the patina is difficult to emulate, while other aspects are fairly easy. One such way to help make a new piece have the aged and more authentic look is to use rusty hardware (hinges, screws, square nails, etc). You can buy this look already done but it's expensive. I have been doing the rusting process myself for several years and it's relatively easy and much cheaper, while not entirely safe if you don't take some precautions. 

First you have to get all steel nails, screws, hinges or whatever you plan to rust. I purchased 200 #8 x 1" slotted screws for this demo and they cost me $12 in bulk. They come with a zinc coating on them all bright, shiny and new. To get them to where I want them, all rusty and grungy looking, I began with a dip in a bath of muratic acid, the kind used for swimming pools. I get mine at the big box store. It's diluted quite a bit and works good for this process although a respirator and doing this outside is a must (shop tools and their steel surfaces will rust as well just from the fumes in the air). The fumes from the acid is very unpleasant to breathe. After I have the respirator on and I'm in the grass outside away from any concrete (muratic acid will eat concrete) I pour the acid into either a plastic or glass jar till it just covers the screws etc. You'll see a yellowish bubbling froth start to appear. After a few seconds the froth dies back down and has eaten all the plating that is put on the screws. It gives a dull grey appearance.
Next I pour the acid back into the jug it came in (it can be used over and over) and pour in plain water into another plastic or glass jar. Dump the screws into the water, let them set for a few minutes then simply pour out the water and place the screws on a shop rag and let them air dry. It usually takes 24 hours for them to be ready to use. If it doesn't get enough rust the first go around I squirt more water on them and let it set again and completely dry. It's rare that I have to do it more than twice. Then once dry, they look like the aged, old screws almost every antique has.   If it was this easy to get the aged patina on wood, my job would be simple.

Monday, December 5, 2011

Windsor Barstool

    I've been playing around with a few different ideas on making Windsor Barstools which seem to be, at least for me, becoming more popular. I've been making side chair versions for a little over a year now and thought the arm chairs might be something to think about too. I made this Philadelphia Arm chair version this past week and am pretty happy with the results except for maybe the paint choice. More on that in a second. I think this would make a great set of barstools to set at a counter in the kitchen and honestly it's pretty damn comfortable too.
                                                 Anyway now for a little about the paint.
  
     Originally I painted it with Real Milk Paint's Union Blue over Yellow Ochre and thought initially it looked decent. After a coat or two of the oil/varnish mix I top coat with, I began to see that it wasn't the right look in my eyes. I had some Ultra Bond that is suppose to make the milk paint stick to almost anything, so I mixed it in with some black to see how well it works. I am completely happy with that product. Even over a couple of coats of oil/varnish mix the black milk paint bonded and is just as tough as it is when it goes on bare wood. That's a very good thing to know when I am working on a customers chair and the paint colors aren't coming out right.
     If you've ever used Milk Paint you know it's hard to tell what it will look like till you have a coat or two of finish on. Then it's been where you have to sand back down to bare wood and it's a total pain in the hind-quarters.  I'm glad to say even if the oil is on you can change the color without all the sanding and scraping I've had to do in the past. I know my arms and shoulders appreciate that product too.

Wednesday, August 17, 2011

Covered Wagon Bed

    Now that I am caught up for a week I have to try and get this bed knocked out. It's a bed for my 2 year old daughter, Lily. My wife came to me and said Lily needed a new bed. She is at the age where she's ready to start crawling out and we don't want her to climb out of the crib thats off the ground 3 or 4 feet, so I thought, what would be a good bed that would be unique at the same time and after a few weeks of looking online, I thought, I've never seen a covered wagon bed (light bulb). I looked online for ideas and all I could find were pictures of old wagons and ones people had restored. I needed it to fit her toddler mattress and being that she like us to drape blankets over her crib at night and call it her "tent" I thought this would be perfect. I began with a dovetailed box that will fit her mattress and just went from there. Being that I had several oak logs, I split out the bows that will have the canvas covering them and steam bent them around one of the wheel rims. It worked perfectly. Today I got the wheel hubs and and spokes made and hopefully tomorrow I can get the wheels all put together. This is a very fun and at times a real head scratcher but fun project. I'll post more pictures of the process as I get further along.

Thursday, July 7, 2011

Much needed storage

 After last weeks chair class, I realized I needed a better place to keep my tools for both myself and for the classes. I have always loved to look at those standing tool chests that house all those great hand tools both in drawers and in the deep doors. It was a perfect time to jump on it and get one for my chair making tools.
 I made it out of curly maple (I have a obsession with that wood) plus I had enough wood to make what you see here. I would have liked to make it a bit bigger but with what wood I had on hand I thought I'd see what I could do. I looked through several books on tool chests, a few blogs and web sites, I got several ideas on what looked great but you have to make it to fit you and your tools so with a general idea in my head I just went to it. I wanted something that would give me some drawer storage but not so many I would be months making it. I hand cut the dovetails on front and back of each drawer which is time consuming but if you ask me looks SO much better than any routed dovetail. I made the doors deep to fit tools I use the most and the drawers will have the french fit tools areas (cut outs the house each individual tool). Here I have just gotten it stained and a coat of oil on it. I love my stuff to have an aged appearance so I'll do a few more steps with glaze and shellac to finish it up.
This is a side view that shows the hand cut dovetails on the doors. This adds a ton of strength to the already heavy doors and once the tools are place inside I won't have to worry about it ever coming apart and tools crashing on the concrete. Instead of staining the interior of the doors and lower cabinet, I decided to hide a few flaws with a coat of Cream Milk Paint. I thought the tools would show up better plus the stain I used was an aniline dye I mixed and didn't have enough to make another batch, I hope I don't regret doing that.
                                                                Now on to finish her up.

Sunday, May 8, 2011

Fan Back Chairs

Here is the finished chairs for an order going to a house on the island of Nantucket. The order also includes the "Titanic" settee, an 8 foot long Sack Back Settee that came out perfect in my opinion. I had a nice day finally after all the rain we have gotten to take these outside and set them in the nice green grass and get some photos taken. I think the green background makes them look really good and the light from the sun shows off better than a flash can do.

This is one of the two Nantucket Fan Back arm chairs for the order. All this is pretty faithful to the old ones except I use my own turning style (based off of Curtis Buchanan's and Peter Galbert's styles) and the rake and splay of the leg angles are of my own interpreting. I've never had any training or taken a class to learn how to make chairs or anything for that matter, I just kind of went for it and I do have to say that after 10-11 years of making furniture I've still got some things I'd like to improve. 

Building the side chairs for this order was actually the easiest part of it. I had 8 of these to make and they just all came out within an 1/8" other each other, but even so, side chairs are easier to make because you have fewer parts to make and paint.  I have been asked what is the hardest thing about building furniture and my answer is always, the paint, stain and finish. One persons idea of wear is different from anothers almost every time. Some people like a paint finish with no wear at all, some want more wear than I like to do. Theres a line you have to tip toe around with that, because in all honesty the finish is the most important aspect of a piece. You can build the most beautiful piece of furniture and put a bad finish on it and it can ruin it, however you put a great finish on a bad piece and it will make the piece into something spectacular. The hard part is doing both on the same piece. Once you can achieve that you've got something special.

Thursday, April 14, 2011

And the paint goes on...continued

Here I am putting the black milk paint coat on. The chair is getting into the final stages and becoming more of what you think a Windsor Chair looks like. 

After the black Milk Paint dries, again for at least 4-5 hours, overnight is even better,  I will put on at least 2 coats of the mixed finish I use and depending on how it looks after the second coat I will put on a 3rd coat if needed. The mix I use is a 1:1:1 mix of Spar Varnish, Boiled Linseed Oil, and thinner. Once dry, the chair will overtime develop it's own wear and look even better. The more it's sat in, the more it will take on a shine in the areas it comes into contact with bodies.

Tuesday, April 12, 2011

The Painted Titanic

Here is how the Titanic looked after it was painted. I have to say this was a hard chair to paint. With 37 back spindles, 10 legs, 9 stretchers and all the in between areas, it took quite some time to get it completely coated. The nice thing about it though was by the time I had gotten to the end of painting, the parts I did first were almost completely dry. For the finish, I used a 1:1:1 mix of Spar Varnish, Linseed Oil and Naptha as a thinner.

And the paint goes on...

Here is what is known as "in the white". A chair ready for paint and begging for color.

Here the first color is going on. This is Terra Cotta Red. I always start with the undercarriage and work my way up. The bottom of the stretchers get the first dose of color and I always complete an individual part before moving onto the next. You can also see my label I put on the underside or the seat. I sign and date every piece I make and glue on a paper label. The underside of the chair only gets a coat of Linseed Oil and will age to a golden brown color in just a few years.

After the whole chair is painted, I set it aside to dry at least for 4 or 5 hours. If you apply Milk Paint to soon to a previous color the water in the next color can soften the first making it a blob of a mess. This chair will be ready for the black tomorrow.