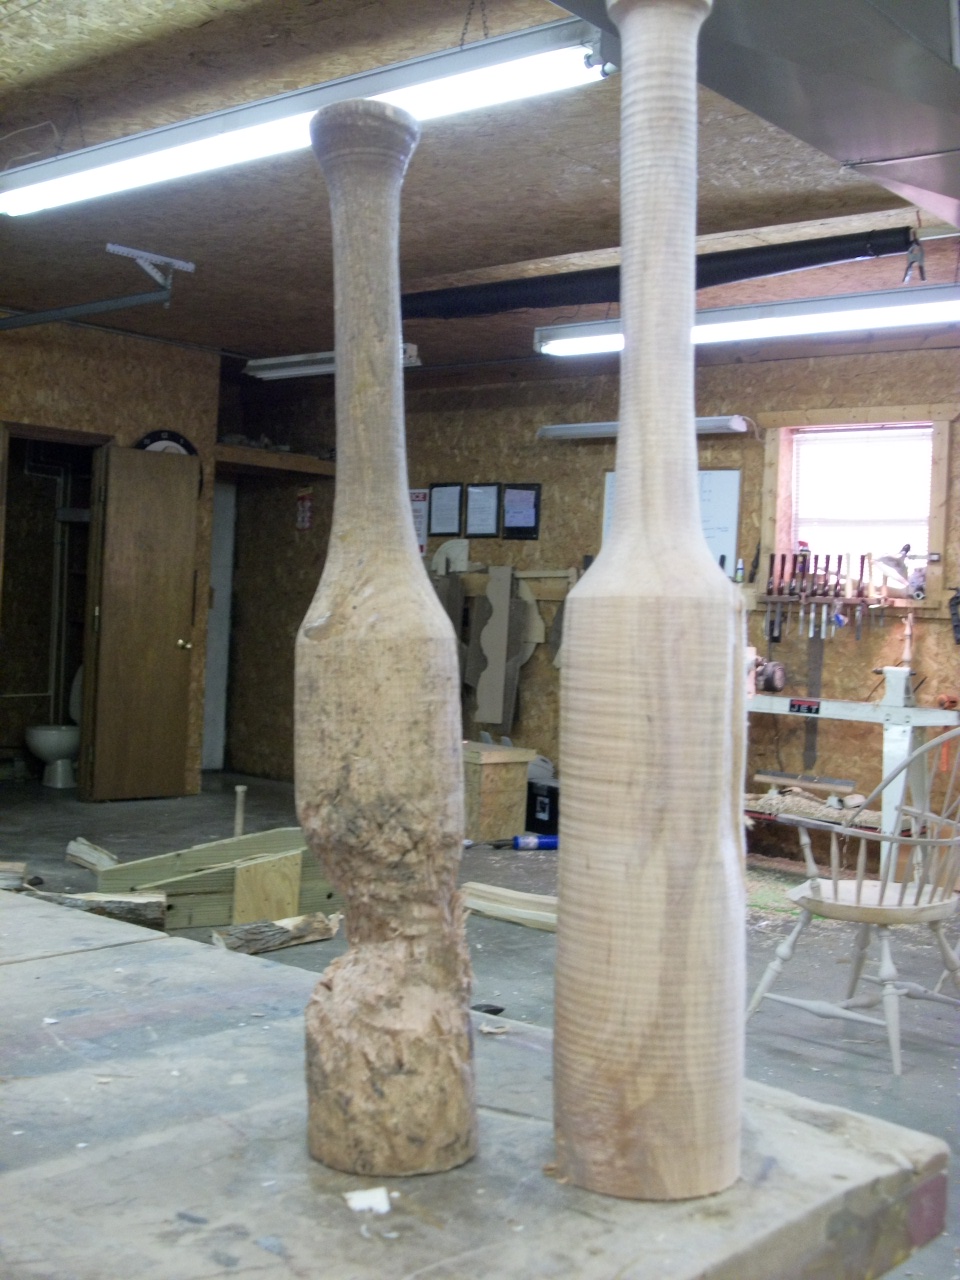
The one major thing you have to know is, the skew has to be super sharp. Now I'm not talking just sharp, there's not just a quick run over a stone and use it for the next 6 or 8 turnings kinda sharp, I talking scary sharp, like in between EVERY turning it needs to be touched up and polished. The kind that should be able to cut the end grain on pine and leave that waxy, smooth, polished look behind, or the kind that all of a sudden you look down and there's blood all over, sharp, yeah, y'all know what I'm talking about. This is that kind of sharp.
Jefferson Swivel and Secretary

Showing posts with label Lathe. Show all posts
Showing posts with label Lathe. Show all posts
Saturday, January 21, 2012
Skewing around...
The one major thing you have to know is, the skew has to be super sharp. Now I'm not talking just sharp, there's not just a quick run over a stone and use it for the next 6 or 8 turnings kinda sharp, I talking scary sharp, like in between EVERY turning it needs to be touched up and polished. The kind that should be able to cut the end grain on pine and leave that waxy, smooth, polished look behind, or the kind that all of a sudden you look down and there's blood all over, sharp, yeah, y'all know what I'm talking about. This is that kind of sharp.
Thursday, January 12, 2012
New Year...New Froe Club

I was splitting out some spindles for some chairs today and after a few hard whacks my froe club broke in two. I made the broken one back in June 2011 out of hard maple. I know the date because I wrote it on the one I was replacing the now broken one with. I am trying to find what woods work best for a froe club that I have on hand. Red Oak, White Oak, Hard Maple, and Walnut are the spieces I use for chairs most often and almost always have at my disposal. I would like to find a piece of Dogwood but haven't had the luxury yet for it to be placed in front of me to try. I am writing the date I retire the old broken one so I can see how long the next one will last.

So after using the red oak one for about a year and getting a pretty good amount of use out of it, now the maple one has only gone about 7 months. I am trying out a white oak club. Here is a short video on how I go about making my clubs. This is roughly the size I start all the clubs I've made with 4" sq and 17" long. It works great for me and I love the balance this size gives.
Thursday, September 29, 2011
Splitting (riving) Hard Maple for Chair Parts

As I began a new and rather large chair order this week, 10 to be exact. I went through the maple logs I had gotten 3 or 4 months ago and they just weren't up to par. So I had to search out another nice maple, (hard to find in Missouri by the way) that could get enough parts for all 10 chairs and extra if needed. I found this beauty at my local log guy. It was about 20" in diameter one way and 17" the other and 9 foot long or so. It was really nice and straight and just had one little blemish on the bark. So I bought it got it home and began cutting it to rough length. This is how I laid out my blanks.
Instead of the "normal" way of splitting it into 1/8ths I tried basically making it a large checker board. I drew lines first across the center as normal and then again across the other way making 1/4's, then instead of drawing lines into 1/8th's I decided to lay it out every 2-1/2" from those first two lines, it gave me what you see in this picture.


I did have a few that were unusable, mostly the 4 that were dead center and a couple around the outside, but this photo shows, out of just one of the sections I cut to 24" long, it got me about 30 billets and just had 4 or 5 that are going to be firewood this winter. I'll have to make sure all goes well with this method, and if so, I believe I'll be using it permanently. Now to rough turn them all round and begin making chair parts.
Sunday, September 25, 2011
Shaker Table w/ Company Boards

Earlier this year I had made a set of 8 Windsors for a customer and they then asked me to make them a table. They needed something that would fit the everyday space they had but during holidays they needed it to become larger. My suggestion was company boards. Company boards are just that, boards you put on the table when company comes over. Unlike table leaves, company boards go on the end of the table eliminating the crack always in the center of the table.
They wanted a shaker style table with simple turned legs and no frills. This is the table I made for them. Pretty much a shaker inspired table, made out of cherry, and plain and simple.

The only drawback to company boards are they have to be stored when not in use. They are 36" long and 18" wide making them hard to store on the underside of the table. A closet would be my choice.

For making extra room for "Company" they work great. They slide in through notches in the aprons and gravity takes over once inserted all the way in.

This table can go from 60" long for 6 people, up to 96" long for 8 . Makes a wonderful way to add more chairs around the Turkey dinner. Plus with a normal leaf table, you always have the crack in the center of the table and the grain usually goes across the table, not an attractive look in my mind.
Saturday, August 27, 2011
Covered Wagon Toddler Bed finished


Wednesday, July 27, 2011
Windsor DVD
Here is a promo to my DVD on making a Bow Back Windsor. I use a few new techniques now but this is basically how it's done. There are a few things I left out on the DVD because it was intended to be given to students taking my chair class as a warm up for what to expect and what they need to kind of familiarize themselves with before coming to the class. The DVD is about 30 minutes long and is available on my web site for purchase.
Tuesday, July 26, 2011
Beaten to death

There are times when you know you have to get a new tool. When one is broken, worn out, or not doing the job needed. Well this is one of those times. Here you can see my old beaten froe club, it's only a little over a year old but it has just about reached the end of the road. I made a new one out of maple thinking it will hold up a little better but that is yet to be seen. The "beaten" one is red oak and could probably last another few months but I had time and a piece of maple to make the new so I thought what the hell. It's a bit taller and a bit fatter and the weight is considerably more ,it's fresh from a log, I put the date I "retired" the old one to see how long the maple one will last. If I can get a piece of dogwood I would make one out of it, as dogwood doesn't split. I hear it will out last just about anything you can make a club with.
Friday, March 25, 2011
Lathe tool rest


Subscribe to:
Posts (Atom)