Jefferson Swivel and Secretary

Showing posts with label Jigs. Show all posts

Friday, January 13, 2012

Shaping a Windsor Chair Spindle


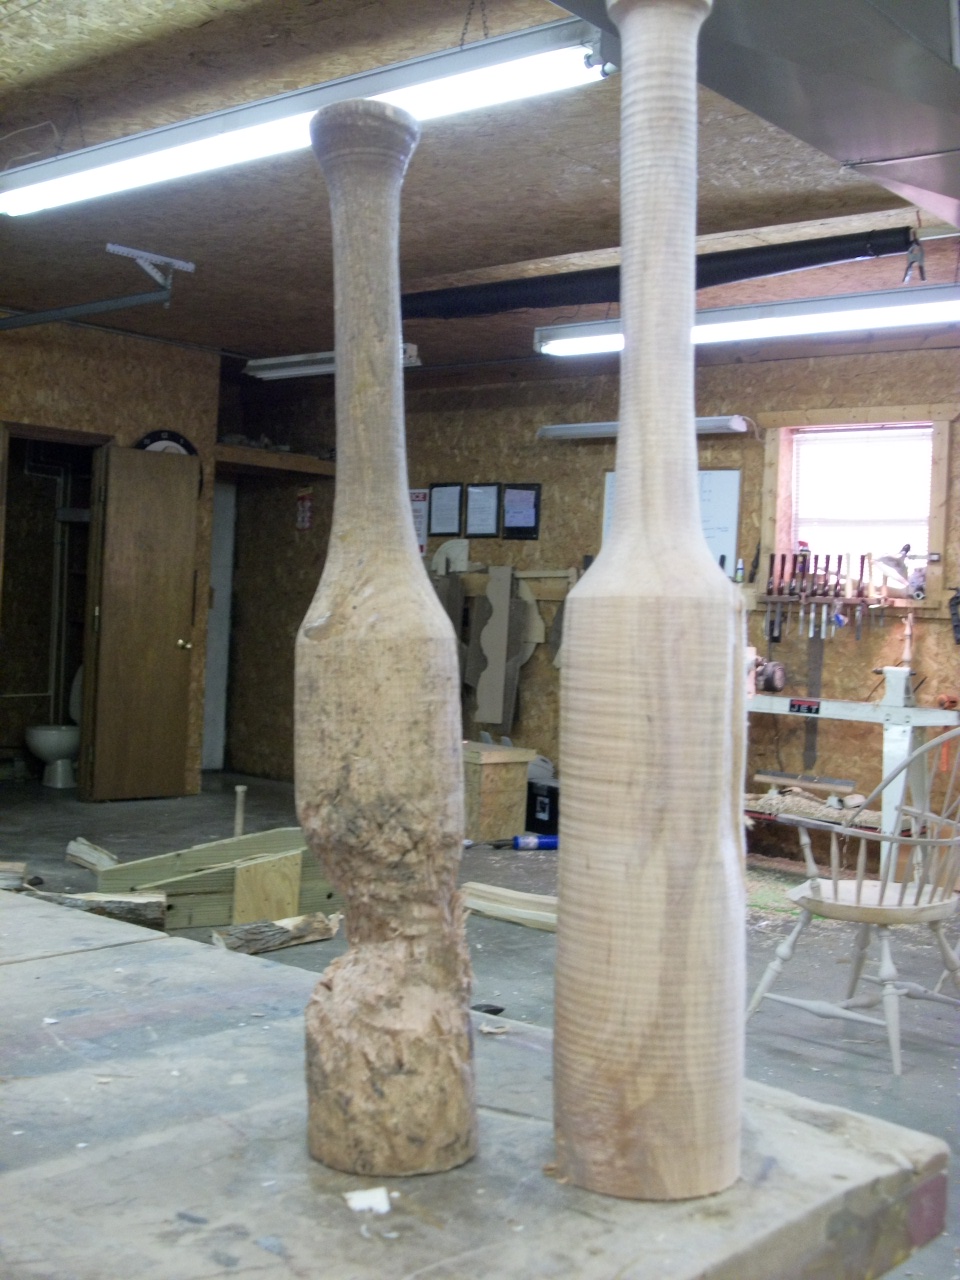
 After browsing over my past videos uploaded to YouTube, I watched the one on Spindle Making. While I'm never happy with the way most of my videos come out, that video I am defiantly not happy with. It shows basically nothing but a "buffoon" hacking away at a stick of red oak. I didn't speak one word as to what I was doing or how I got to that particular point in the process. It's just a close up of me trying my best to make a video on a subject I thought I knew something about.

So with spindles to make for the chairs I'm making now, I thought this is a good time to redo a spindle video. Maybe I can give someone wanting to make a Windsor, a little more detail on how to shape them than I had when I first started.  I'm going to leave the old spindle video up and let you all comment on which one gives more info on the process and helps you make a spindle. I'm pretty sure which one it'll be but I'll let you tell me in your own words. Who knows I may have to make another with better ideas from you.

Wednesday, November 30, 2011

Hold Fasts that hold fast

I have always been fascinated with a pair of hold fasts, the little bent metal tools you see everyone using in hand tool work. Seemed so cool to be able to set a work piece in place, anywhere you have a hole. I had never owed a pair till about a month or two ago. First I bought a cheap pair from Rockler, they were cast iron pot metal, about 8 or 9 good whacks and, BAM, broken in two. I thought great just my luck, but what I realized, and what most of you probably already know, is that even though those were "cheapies", I still found a tool that is a must in the shop. I don't know how I ever got by without a pair for so long now. Now I needed a real pair that will hold up indefinitely and not snap once I wrap on it with a bit of force. That's when I started looking around online for a new pair. I ran across a pair of Gramercy's from www.toolsforworkingwood.com WOW these things are great. For $32 you get 2 that are solid steel and not going to break. I built me a little bench that I use for carving chair seats out,  drilled a dozen or so holes in it and I use that bench for so much more now.  These are the best tools for holding work in place, plus you get to get some fustration out if you need a little vent time. I don't know why it took me so long to get a pair of these, guess it takes some people a little longer to catch on.

Sunday, August 7, 2011

Hand-cutting a Dovetail Drawer Parts 1& 2


        Here is a video on cutting all the dovetails in a drawer. It goes through all the steps I use to make a  complete drawer with hand tools only (except cutting stock to length and width), from layout to cutting and chopping to using a Stanley #45 hand plane to cut the grooves in the drawer front and sides, plus chamfering the solid wood drawer bottom with a rabbeting plane.

Tuesday, July 26, 2011

Beaten to death

There are times when you know you have to get a new tool. When one is broken, worn out, or not doing the job needed. Well this is one of those times. Here you can see my old beaten froe club, it's only a little over a year old but it has just about reached the end of the road. I made a new one out of maple thinking it will hold up a little better but that is yet to be seen. The "beaten" one is red oak and could probably last another few months but I had time and a piece of maple to make the new so I thought what the hell. It's a bit taller and a bit fatter and the weight is considerably more ,it's fresh from a log, I put the date I "retired" the old one to see how long the maple one will last. If I can get a piece of dogwood I would make one out of it, as dogwood doesn't split. I hear it will out last just about anything you can make a club with.  

You can see it's almost all the way to the middle on one side. I guess I naturally used it the same way every time. It may have dug in on the one side and just by force turned as I used it, I'm not sure,  but what I am sure about is even being red oak it made a bunch of split out pieces over the course of a year for me.

Wednesday, May 11, 2011

Upholstered Frame work

Here is how I make the frames for my upholstered chairs. It's mortised and tenoned at the critical joints, the seat and arm rails to the legs and the crest rail to the back legs, these joints take the most abuse so I think they need added strength, but I also use pocket screws to lock in the wings and pull thru areas ( the areas not taking such a beating over time). I have tested the strength of this method and have been very convinced it will hold up for more years than I will be around. I paint the legs with Milk Paint before the chair gets any fabric. If anyone is looking to make an upholstered chair there's alot of things an upholster needs for him to cover the piece. Once I finally figured out how to make everything for this chair (which by the way, was off of a photo with the chair covered in fabric, not easy to do), I made my patterns and came up with what I thought was a pretty good proportioned looking chair. Of course when it's covered, the cotton batting and all the fluff makes it seem a bit smaller but you still have plenty of room and I do have to say these chairs are extremely comfy.

Thursday, May 5, 2011

Mortise and Tenon Router jig

To make the many angled mortise and tenon joints for my upholetered furniture, I made this jig used with a plunge router. It can bevel to any angle up to about 10 degrees and even make a compound mortise if need be. I didn't want tospend the money to buy a Leight FMT jig $500 so I made one based off of it with scraps laying around the shop and a few toggle clamps. I made if for maybe $50. I can make a template to do a tenon in the end of the piece, however, I think a loose tenon is easier and so I have never got around to make the new template.


                          It's a pretty crude looking jig but it works great and is pretty simple to set up.
 This shows the cross hairs that you use to set up the mortise position. I mark a center line on the work piece where I want the mortise and move the cross hairs to to line up with that. Set my length of the mortise with a couple of stop blocks and rout the depth I need. Works really good for those difficult to make angled mortise and tenons.
The tenon shown here is just a piece ripped on the tables saw and then planed to thickness, in this case 3/8".
Without any glue this make for a strong joint that will hold these pieces of furniture together. Once the glue is put in it will be here long after I'm gone.