I thought I would show how I go about making a glass door for my cabinets pieces. Instead of using a cope and stick router bit set, I opt for a better (in my opinion) offset mortise and tenon joint. It takes a bit of time to figure out at first but it really isn't difficult and makes a super strong door. When working with glass I want all the strength I can get. I have done it with the router version before and it works fine but I have also broken the the joint by accidentally dropping it on the floor. Granted the profile on those bits give a nice look, but to me they also look like kitchen cabinet doors made in a factory. With a mortised joint it is pretty much going to look like furniture. If you put a square peg through it, I don't ever see it coming apart and it will set the door in a more furniture realm than kitchen cabinets.
Jefferson Swivel and Secretary

Thursday, July 28, 2011


Wednesday, July 27, 2011
Windsor DVD
Here is a promo to my DVD on making a Bow Back Windsor. I use a few new techniques now but this is basically how it's done. There are a few things I left out on the DVD because it was intended to be given to students taking my chair class as a warm up for what to expect and what they need to kind of familiarize themselves with before coming to the class. The DVD is about 30 minutes long and is available on my web site for purchase.
Tuesday, July 26, 2011
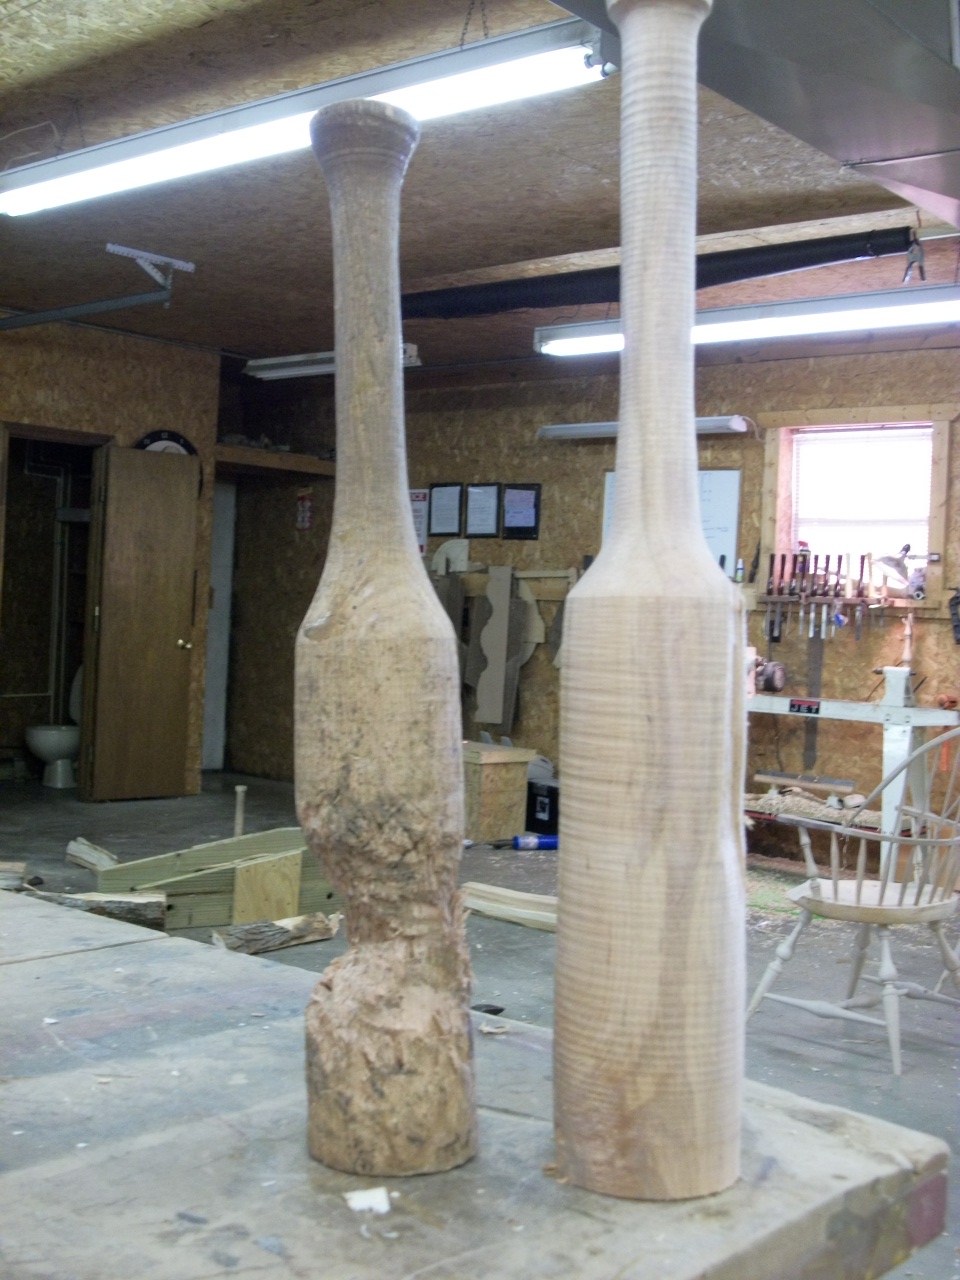
Beaten to death

There are times when you know you have to get a new tool. When one is broken, worn out, or not doing the job needed. Well this is one of those times. Here you can see my old beaten froe club, it's only a little over a year old but it has just about reached the end of the road. I made a new one out of maple thinking it will hold up a little better but that is yet to be seen. The "beaten" one is red oak and could probably last another few months but I had time and a piece of maple to make the new so I thought what the hell. It's a bit taller and a bit fatter and the weight is considerably more ,it's fresh from a log, I put the date I "retired" the old one to see how long the maple one will last. If I can get a piece of dogwood I would make one out of it, as dogwood doesn't split. I hear it will out last just about anything you can make a club with.
Sunday, July 24, 2011
Curtis Buchanan YouTube videos
If you haven't seen them yet you are really missing out. Tennessee Chair maker Curtis Buchanan has been putting together a video on YouTube on how to make a Comb Back Windsor. In my opinion Curtis is probably on the top of the list as far as Windsor Chair makers. His style and quality are superb and he has just done it so long he is really amazing. I have never met him, but, believe me I look at his chairs constantly as inspiration for mine own. I try and strive for the perfection he just automatically has.
If you are interested in Windsor Chair Making and don't have time or money to take a class these videos will greatly help you and they are free. I find myself looking at them over and over to see little tips and tricks that Curtis is so kind enough to put out there for the rest of us. In his Videos he goes from getting the right logs to splitting to turning. As of this post, there are 8 videos total but from what I understand he is going to do the entire chair start to finish. Click on this link to go to the beginning of the videos. Very valuable info for anyone wanting to learn, advance themselves, or just see how much work goes into a Windsor.
If you are interested in Windsor Chair Making and don't have time or money to take a class these videos will greatly help you and they are free. I find myself looking at them over and over to see little tips and tricks that Curtis is so kind enough to put out there for the rest of us. In his Videos he goes from getting the right logs to splitting to turning. As of this post, there are 8 videos total but from what I understand he is going to do the entire chair start to finish. Click on this link to go to the beginning of the videos. Very valuable info for anyone wanting to learn, advance themselves, or just see how much work goes into a Windsor.
Thursday, July 7, 2011
Tool Chest finished


I plan using it for plans and books for easier viewing and keeps books clean and off the bench.

Subscribe to:
Posts (Atom)